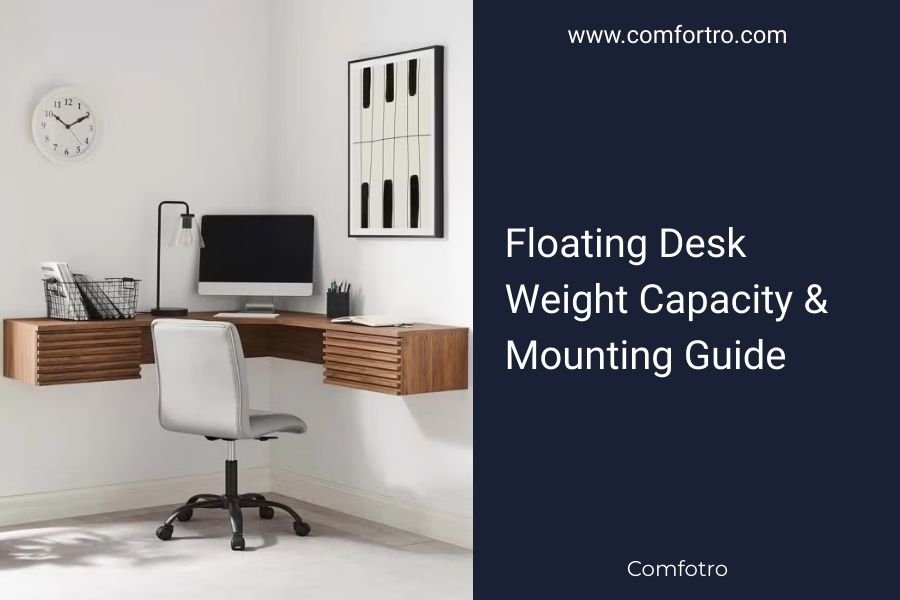
Most floating desks can support between 25-100 pounds when properly mounted to wall studs using appropriate hardware.
Your floating desk weight capacity depends on the desk material, wall type, mounting hardware quality, and proper installation technique.
Understanding Floating Desk Weight Limits
Before you buy that floating desk, you need to know what it can handle. Think of it like a shelf with attitude – it looks sleek, but physics still apply.
I researched dozens of floating desk models and found that weight capacity varies dramatically. Budget models might only hold 25 pounds, while premium options can support 100+ pounds.
What Affects Weight Capacity
Several factors determine how much weight your floating desk can hold safely:
- Desk material and thickness
- Wall construction type
- Mounting bracket design
- Hardware quality and size
- Installation accuracy
Desk Material Makes a Difference
Solid wood floating desks typically handle more weight than particle board or MDF versions. I found that hardwood desks often support 75-100 pounds, while engineered wood tops out around 50 pounds.
Your Wall Type Matters Most
Drywall alone won’t cut it for heavy loads. You need to hit those wall studs. Concrete or brick walls can handle much more weight than standard drywall construction.
Calculating Your Weight Needs
Let’s get practical. What will you actually put on this desk?
Common Desktop Items and Their Weight
| Item | Approximate Weight |
|---|---|
| Laptop | 3-8 pounds |
| Desktop monitor | 8-25 pounds |
| Desktop computer | 15-30 pounds |
| Printer | 10-40 pounds |
| Books and supplies | 5-15 pounds |
Add It All Up
Don’t forget about temporary loads. That stack of textbooks or the extra monitor for your big project adds weight fast.
I recommend planning for 25% more weight than your current setup. You’ll thank yourself later when you don’t have to worry about every item placement.
Choosing the Right Mounting Hardware
Your hardware is the hero of this story. Cheap brackets are like trusting a paper clip to hold your car keys.
Types of Mounting Systems
From what I read, there are three main mounting approaches for floating desks:
Hidden Bracket Systems
These mount inside the desk for that true “floating” look. They’re strong but require precise installation. Weight capacity usually ranges from 40-80 pounds.
Cleat Mounting Systems
These use a wall-mounted rail system. They distribute weight well and can handle 60-100+ pounds when installed properly.
Standard L-Brackets
The budget option. They’re visible but reliable. Good ones can support 50-75 pounds per pair when mounted to studs.
Hardware Quality Indicators
Look for these signs of quality mounting hardware:
- Steel construction over aluminum
- Powder-coated finish
- Multiple mounting points
- Thick gauge metal (14-16 gauge minimum)
- Clear weight ratings from manufacturer
Step-by-Step Mounting Guide
Ready to mount your floating desk? Let’s do this right the first time.
Tools You’ll Need
- Stud finder
- Level (24-inch minimum)
- Drill with bits
- Screwdriver
- Pencil for marking
- Measuring tape
Find Those Studs
This step makes or breaks your installation. Wall studs are typically 16 or 24 inches apart. Use a quality stud finder and double-check by drilling small pilot holes.
Mark Your Height
Standard desk height is 28-30 inches from the floor. Measure twice, drill once. Trust me on this.
Installation Process
Here’s the step-by-step breakdown I recommend:
Step 1: Mark Stud Locations
Use your stud finder to locate at least two studs where your desk will mount. Mark them clearly with a pencil.
Step 2: Position Your Brackets
Hold brackets against the wall at your desired height. Use your level to ensure they’re perfectly horizontal. Mark screw holes.
Step 3: Drill Pilot Holes
Drill pilot holes slightly smaller than your screws. This prevents the wood from splitting and gives you better holding power.
Step 4: Mount the Brackets
Use the screws provided with your mounting system. If they seem too small, upgrade to longer wood screws that penetrate at least 2 inches into the stud.
Step 5: Test Before Final Installation
Apply gentle pressure to test the mount strength before attaching your desk top.
Common Mounting Mistakes to Avoid
I’ve seen these mistakes countless times in home office forums. Don’t be that person.
Skipping the Stud Finder
Drywall anchors alone won’t support a loaded desk. Even heavy-duty toggles have their limits. Always mount to studs for floating desks.
Using Wrong Screw Length
Those tiny screws that come with budget brackets? They’re often too short. You want at least 2.5 inches of penetration into the stud.
Ignoring Wall Conditions
Old plaster walls, metal studs, or unusual construction need different approaches. When in doubt, consult a professional.
Safety Considerations
Your floating desk should enhance your productivity, not become a safety hazard.
Regular Inspection Schedule
Check your mounting hardware every few months. Look for loose screws, wall cracks, or any movement when you lean on the desk.
Weight Distribution Tips
Keep heavy items close to the wall where the support is strongest. That printer belongs near the back, not hanging off the front edge.
Signs of Overloading
Watch for these warning signs that your desk is carrying too much weight:
- Visible sagging or flexing
- Creaking sounds when loading items
- Loose screws appearing regularly
- Small cracks in wall around mounting points
Maximizing Your Desk’s Capacity
Want to get the most from your floating desk setup? Here are some pro tips.
Add Support Where Needed
Consider adding a subtle support leg at the front corner if you need extra capacity. It maintains most of the floating look while boosting weight limits.
Use Wall-Mounted Storage
Keep heavy items on separate wall shelves instead of loading everything onto your desk surface.
Conclusion
Your floating desk can be both beautiful and functional when you match its capacity to your needs and install it properly. Remember that most floating desks handle 25-100 pounds depending on materials and mounting quality. Always mount to wall studs, use quality hardware, and don’t exceed the manufacturer’s weight ratings. With proper installation and realistic expectations, your floating desk will serve you well for years to come.
How do I know if my wall can support a floating desk?
Check if you have standard wood studs 16 or 24 inches apart using a stud finder. Drywall over wood framing can support floating desks when properly mounted to studs. Avoid mounting to drywall alone, hollow walls, or damaged wall areas.
Can I install a floating desk without hitting studs?
No, you should always mount floating desks to wall studs for safety and stability. Heavy-duty drywall anchors might hold light decorative shelves, but they’re not suitable for desks that will hold computers, monitors, and other equipment.
What happens if I exceed my floating desk’s weight limit?
Exceeding weight limits can cause the desk to sag, pull away from the wall, or fall completely. You might also damage your wall or mounting hardware. Start with lighter loads and gradually add weight while monitoring for any signs of stress.
How often should I check my floating desk mounting?
Inspect your floating desk mounting every 3-6 months, especially if you frequently change your setup. Look for loose screws, wall cracks, or any movement when you lean on the desk. Tighten hardware as needed to maintain safety.
Can I add extra support to increase my floating desk’s weight capacity?
Yes, you can add a support leg at the front corner or use additional mounting brackets along the back edge. Some people also install a subtle support cable from the ceiling, though this changes the aesthetic significantly.