How to Mount a Monitor Arm to a Desk?
On this page (9 sections)
- Choosing the Right Monitor Arm for Your Setup
- Gathering Your Tools and Preparing Your Workspace
- Step-by-Step Installation: Attaching the Base to Your Desk
- Assembling the Arm Components
- Mounting Your Monitor to the Arm
- Making Final Adjustments for Ergonomics
- Cable Management: The Finishing Touch
- Conclusion
- Frequently Asked Questions
To mount a monitor arm to a desk, first, choose the correct mounting style for your desk type and monitor size. The most common methods are a C-clamp or a grommet mount. Then, carefully follow the instructions provided by the monitor arm manufacturer for secure installation. We found that most installations are straightforward and take less than 30 minutes.
Mounting a monitor arm can seriously upgrade your workspace. You’ll gain valuable desk space and enjoy a more ergonomic setup. For another way to clear the desktop, compare a headphone stand and mount. Plus, who doesn’t love a cleaner, more organized desk? We’ll show you exactly how to get that monitor floating effortlessly.
TL;DR:
- Pick the right mount (C-clamp or grommet).
- Gather your tools.
- Attach the clamp/grommet base.
- Assemble the arm.
- Mount your monitor.
- Adjust for perfect viewing.
Ready to ditch those clunky monitor stands and reclaim your desk? Let’s walk through everything you need to know to mount a monitor arm to a desk, step by step.
Choosing the Right Monitor Arm for Your Setup
Before you even think about screwdrivers, you need to pick the perfect monitor arm. This isn’t a one-size-fits-all decision. Your desk type, monitor size, and even how you work all play a role.
Understanding Monitor Arm Mounting Styles
There are two main ways monitor arms attach to your desk: C-clamp and grommet mount. We found these cover most desk types you’ll encounter.
C-Clamp Mounts: The Most Common Choice
C-clamp mounts are super popular, and for good reason. They are easy to install and remove. You simply tighten a clamp onto the back edge of your desk. This method doesn’t require any drilling or permanent alterations to your desk. Most desks with a flat edge can accommodate a C-clamp.
However, C-clamps do require a certain desk thickness. We found that most clamps work with desks between 0.4 and 2.4 inches thick. Always check the manufacturer’s specifications to ensure compatibility with your specific desk.
Grommet Mounts: For a Cleaner Look
Grommet mounts provide a sleeker, more integrated look. They attach through an existing hole in your desk (often called a cable management grommet hole) or a hole you drill yourself. This creates a very stable and secure connection.
If your desk has a grommet hole, this is often the preferred choice. It uses less desk space than a C-clamp. If you’re willing to drill a hole, grommet mounts offer the strongest support, especially for heavier monitors or multiple screens (Occupational Safety and Health Administration – OSHA).
Other Mount Types: Wall & Freestanding
While C-clamp and grommet are desk mounts, you might also see wall mounts or freestanding arms. Wall mounts save all desk space but require drilling into a wall. For a setup without drilling, see our guide to no-drill monitor arm options. Freestanding arms sit on your desk and don’t attach, offering flexibility but not saving space like attached arms. For this guide, we’re focusing on desk-attached options.
Checking Monitor Compatibility (VESA Standard)
Your monitor arm needs to connect to your monitor. This connection is standardized by something called VESA. VESA is an industry standard for mounting interfaces on the back of displays.
Look at the back of your monitor. Do you see four screw holes in a square pattern? That’s a VESA mounting standard. The most common sizes are 75x75mm or 100x100mm. Your monitor arm will list which VESA patterns it supports. Make sure they match.
What if your monitor doesn’t have VESA holes? Don’t fret! You can often find a non-VESA adapter kit for your specific monitor model. This adapter essentially creates a VESA pattern for your monitor, allowing it to attach to an arm.
Considerations: Monitor Size, Weight, and Number of Screens
Monitor arms have limits. They are designed to hold monitors up to a certain size and weight. Always check the arm’s weight capacity and screen size recommendations. Exceeding these limits can lead to instability or even damage.
Are you planning a dual monitor setup? You’ll need a dual monitor setup arm for two screens. These typically attach to your desk at one point but branch out to hold two screens. We found that dual arms can significantly improve productivity for many users (National Institutes of Health – NIH).
Gathering Your Tools and Preparing Your Workspace
Preparation is key. Before you start, make sure you have everything you need. This will make the installation process much smoother and faster.
What You’ll Need: A Quick Checklist
- Your chosen monitor arm kit (with all parts).
- Your monitor(s).
- Screwdriver (often included, or a Phillips head).
- Allen wrenches (usually included with the arm).
- Measuring tape.
- Pencil or marker (for grommet mount drilling).
- Drill (if creating a grommet hole).
- A second person (helpful for larger monitors).
- Soft cloth or towel (to protect your desk/monitor).
Clearing Your Desk and Workspace
Think of your desk as a blank canvas. Remove everything from the area where you plan to install the arm. Clear away papers, peripherals, and anything else that might get in the way. A clean workspace prevents frustration and helps you focus.
If you’re using a C-clamp, ensure the back edge of your desk is clear. For a grommet mount, make sure you have clear access to the grommet hole or the area where you intend to drill.
Step-by-Step Installation: Attaching the Base to Your Desk
This is where your monitor arm starts to take shape on your desk. The process differs slightly depending on whether you’re using a C-clamp or a grommet mount.
C-Clamp Installation
Most monitor arm instructions will have you do this first. It’s usually the easiest part.
- Attach the C-clamp base to the desk edge. Slide the clamp onto the back edge of your desk.
- Tighten the clamp securely. Use the included knob or tool to tighten the clamp until it feels stable. Don’t overtighten, but make sure there’s no wobble.
- Check for stability. Give the base a gentle shake. It should feel firmly attached to the desk.
Grommet Mount Installation
Grommet mounts require a hole. If you have an existing one, great! If not, you’ll need to create one.
Using an Existing Grommet Hole
- Remove the existing grommet cover. These are usually plastic inserts that can be pried out.
- Insert the grommet mount through the hole. Follow your arm’s instructions, as there might be washers or plates involved.
- Secure the mount from underneath the desk. Typically, a large washer and nut are tightened from below the desk to hold the mount firmly in place.
- Ensure stability. Just like with the C-clamp, verify that the base is stable and not rocking.
Drilling a New Grommet Hole (If Necessary)
This step requires a bit more care. Measure twice, drill once!
- Mark the drilling spot. Use a measuring tape to find the ideal location, usually centered along the back of your desk. Mark it clearly with a pencil.
- Choose the correct drill bit size. Your monitor arm instructions will specify the diameter needed for the grommet post.
- Drill slowly and carefully. Start with a small pilot hole, then use the larger bit. For wooden desks, drilling from the top down and then slightly from the bottom up can help prevent splintering.
- Clean the hole. Remove any sawdust or debris.
- Install the grommet mount. Proceed as described above for an existing grommet hole.
Assembling the Arm Components
With the base secure, it’s time to build the arm itself. This usually involves connecting a few pieces.
Most monitor arms consist of one or two main arm segments that attach to the base. Follow your manufacturer’s specific instructions carefully. They might involve sliding pieces together or securing them with screws and Allen wrenches.
At this stage, you might also be installing any gas spring or tension mechanisms. These allow for fluid movement later on. Don’t adjust the tension yet; we’ll do that once the monitor is attached.
Mounting Your Monitor to the Arm
This is the exciting part! Your monitor is about to float.
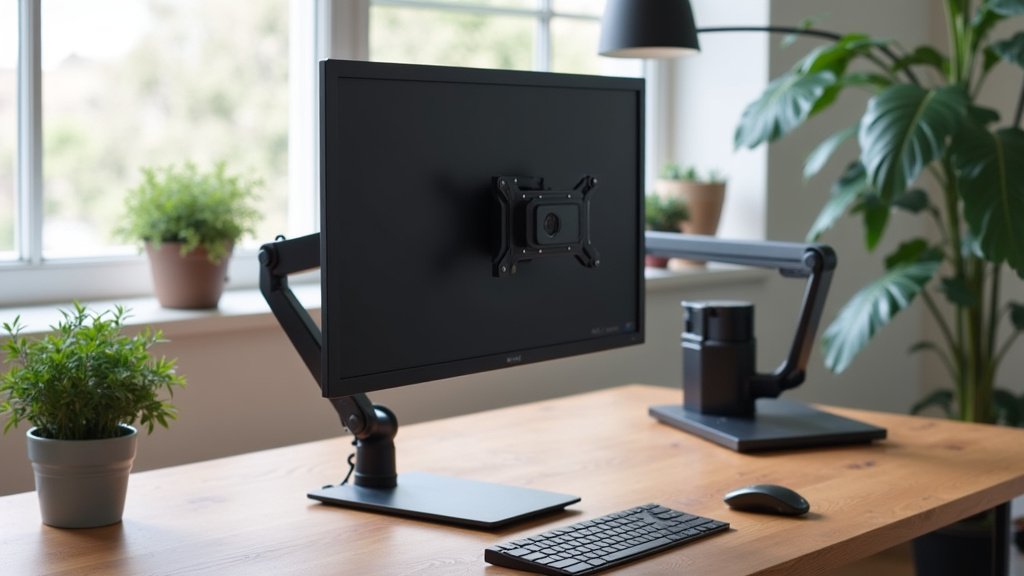
- Attach the VESA plate to your monitor. The monitor arm usually comes with a detachable VESA plate. Line up the screw holes on the plate with the VESA holes on the back of your monitor. Use the screws provided with your monitor arm kit. Do not overtighten; hand-tight is usually sufficient, then a quarter turn with a screwdriver.
- Mount the monitor (with VESA plate) onto the arm. This is often a slide-and-click mechanism or involves tightening a few screws. If your monitor is heavy or large, having a second person help is highly recommended to avoid drops or strain.
- Ensure it’s secure. Gently test that the monitor is firmly attached to the arm before letting go completely.
Making Final Adjustments for Ergonomics
Now that your monitor is mounted, it’s time to dial in the perfect ergonomic position. This is where the magic happens for your comfort and posture.
Optimizing Monitor Height
A good rule of thumb is to position the top of your monitor screen at eye level (Mayo Clinic). This allows you to look slightly downward at the screen without straining your neck. Your eyes should naturally fall on the center of the screen.
Adjusting Distance and Angle
Your monitor should be about an arm’s length away from you. This distance helps reduce eye strain. Adjust the tilt so there’s no glare from overhead lights or windows. You want a comfortable viewing angle.
Tension Adjustments
If your monitor arm has a gas spring or adjustable tension, now is the time to fine-tune it. If the monitor drifts down, you need to increase the tension. If it springs up too easily, decrease the tension. Use the included Allen wrench and make small adjustments until the monitor stays put when you move it to a new position.
You want the arm to move smoothly but hold its position once released. This can take a few tries, but it’s worth it for a perfectly responsive arm.
Cable Management: The Finishing Touch
Don’t forget your cables! For monitor arm cable routing, most monitor arms come with integrated cable management channels or clips. Use them! Thread your display cables and power cords through these channels. This cleans up your workspace and prevents tangled messes. A tidy desk often leads to a tidier mind, we’ve found.
| Feature | C-Clamp Mount | Grommet Mount |
|---|---|---|
| Installation Difficulty | Easy | Moderate (if drilling) |
| Desk Alteration | None | Hole required (existing or drilled) |
| Stability | Good | Excellent |
| Aesthetics | Base visible at desk edge | Very clean, integrated look |
| Desk Thickness Limit | Yes, check specs | Less restricted by thickness |
| Ideal For | Renters, quick setup | Permanent setup, heavy monitors |
Conclusion
Mounting a monitor arm might seem like a big project, but as you’ve seen, it’s a straightforward process that offers huge rewards. You’ll gain a decluttered desk, improve your posture, and enjoy a more dynamic workspace. By choosing the right mount, following the steps, and making those crucial ergonomic adjustments, you’ll transform your setup. So go ahead, reclaim your desk space and elevate your computing experience.
Frequently Asked Questions
How much weight can a typical monitor arm hold?
Most single monitor arms can hold monitors weighing between 15 to 20 pounds, but some heavy-duty options can support up to 30 pounds or more. Always check the specific weight capacity listed by the manufacturer for your chosen arm to ensure it can safely support your monitor.
Can I mount two different sized monitors on a dual arm?
Yes, you can often mount two different sized monitors on a dual arm, as long as both monitors are within the arm’s specified weight and VESA compatibility limits. The independent adjustments on most dual arms allow you to align them properly for comfortable viewing, regardless of slight size differences.
What if my desk is glass? Can I still use a monitor arm?
Mounting a monitor arm to a glass desk is generally not recommended with C-clamp or grommet mounts due to the risk of cracking the glass. Some manufacturers offer specialized mounts for glass desks, but a freestanding monitor stand or a wall-mounted arm might be safer alternatives to consider.
Will a monitor arm damage my desk over time?
When installed correctly, a quality monitor arm should not damage your desk. C-clamps distribute pressure, and grommet mounts are very secure. We recommend using a protective pad or a small piece of wood between the clamp and your desk surface, especially for softer wood desks, to prevent indentations.
How often should I adjust my monitor arm’s tension?
You typically only need to adjust your monitor arm’s tension once, after you’ve mounted your monitor. If you notice the monitor slowly drifting down or springing up, it’s a sign the tension needs fine-tuning. Otherwise, once it’s set to hold your monitor in place, you shouldn’t need frequent adjustments.